
Starting a Home Nursery
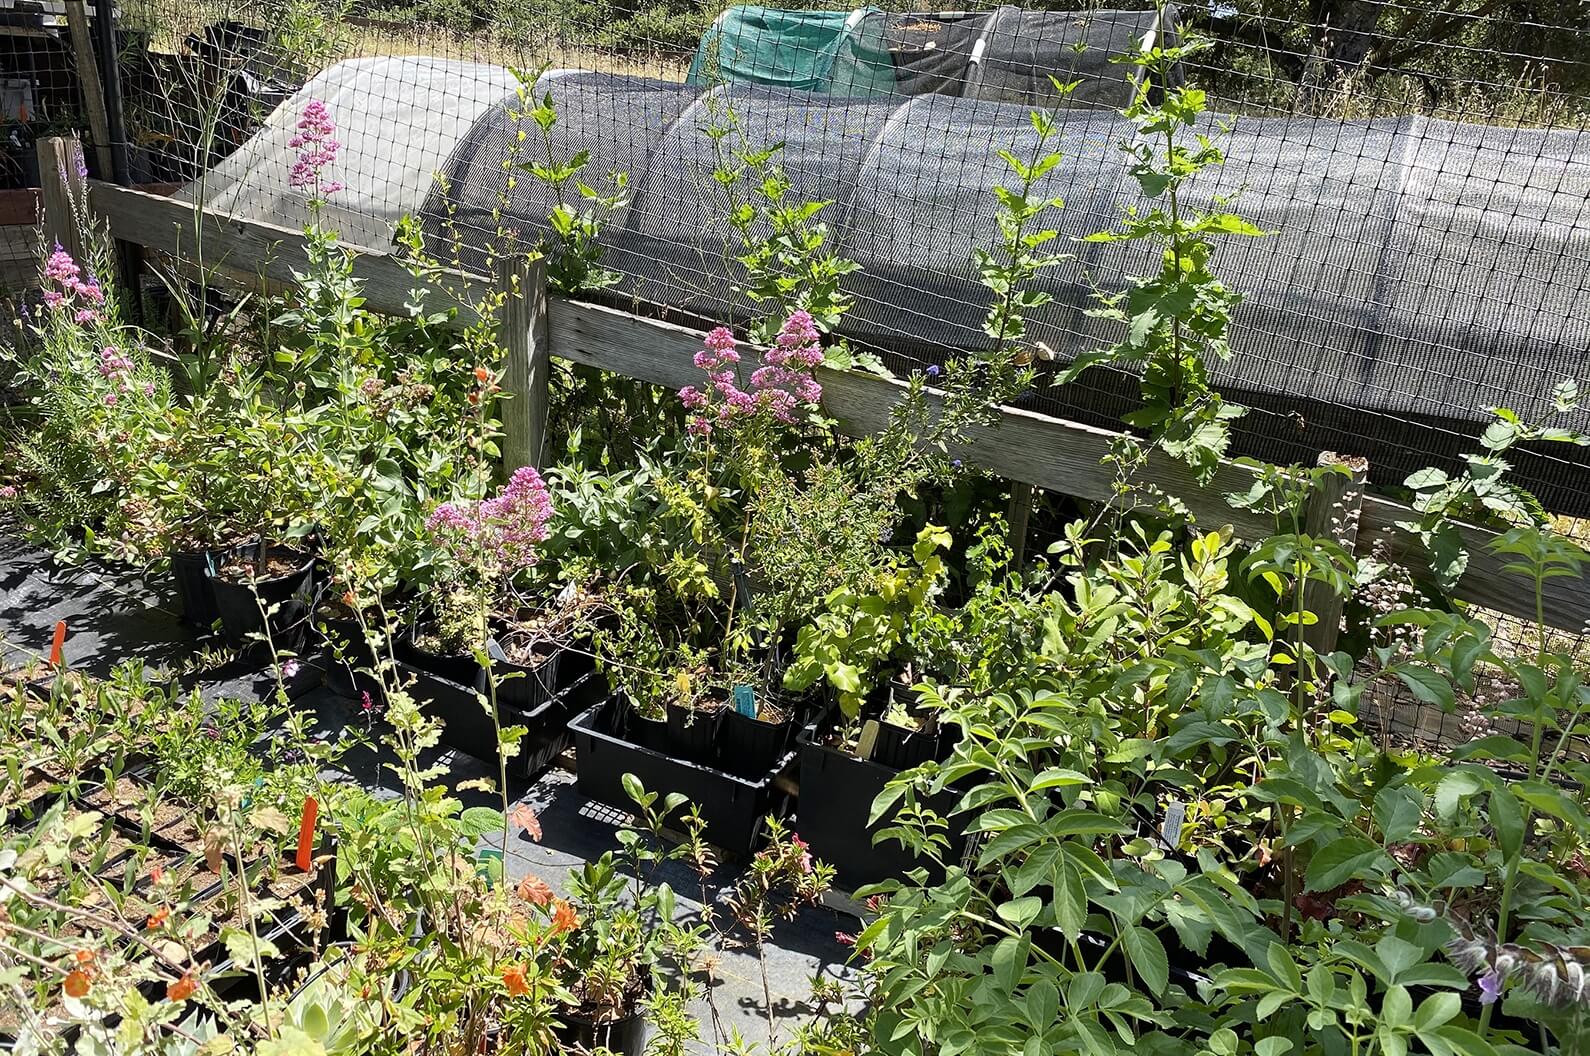
The holding area at my home has heavy mesh fabric on the ground and fencing to keep out the deer.
Starting your own plants from seed puts the whole horticultural world at your fingertips. You can try growing plants that are very uncommon, or you may want to collect your own seed and experiment with native plants that no one else is growing. Starting from seeds is well worth the extra time and planning, and is incredibly rewarding, but plants are often slow to grow to a mature form from seed.
Starting plants from cuttings (cloning) is a fast and rewarding way to grow mature specimens with very particular attributes, but all the plants cloned from one “mother” plant are exact genetic duplicates and that can pose some problems.
Many plant species can be propagated in more than one way. Once you have an established garden full of mature, thriving plants of all types and forms, you can collect your own seed, or take cuttings, or make divisions of certain plants. You will begin to see each plant as a mother plant full of potential for still more plants and that is when the propagation bug has really hit you! To be successful at plant propagation, even on the small scale of a home nursery, it will pay to set up a good work place and automatic systems that simply need to be closely monitored.
What is Your Intent?
There are many different pathways and motivations for propagating plants and your own intentions should help guide you towards the ultimate purpose for all these plants you want to be growing. If you have a very large garden or landscape you may realize that growing many of your own plants will be a better and cheaper way to get the plants you’ll need, but it won’t happen overnight! You may just want to grow enough plants so that you will have plenty to share with friends and relatives, or for a school garden, or a community garden project.
Seeds are so often shared amongst people and moved around the world because the plants they produced were considered valuable to individuals arriving in new places to live—either for their utilitarian purposes or for their connection to the homeland.
“Cuttings” or “clippings” of specials plants are also shared, and are often loving mementos of friends or relatives. It’s a wonderful thing to be reminded of those individuals by the continued presence of “their” plants in your own home or garden. Likewise with plant divisions: skilled and successful gardeners will want to be sharing divisions of plants they consider the best and it’s not just a generous gesture, but also offers advantages to the owner of the garden.
If the subject fascinates you and you really want to learn all the details involved in propagating healthy, vigorous habitat plants, the very best way of all is to join our Home Ground Habitats volunteers and come work with us on a regular recurring basis. You will learn by working side-by-side with a whole group of friendly, experienced volunteers, and by seeing how we manage our growing grounds. Watch for notice of the opening of our new facilities in Novato!
Perhaps you have now caught the propagation “bug” and have a burning desire to grow your own plants. Read on—plant propagation is a complex subject, full of nuances, which only experience helps you sort through. I have tried to be complete in the following tutorial and hope that it is helpful.
How Much Time Can You Commit?
Perhaps you are passionate about gardening and simply want to experience every aspect of the process, including propagation. Maybe gardening is already a large part of your life. Perhaps you have just discovered plants and gardens as a whole new area of interest. Maybe nurturing is just part your nature, and you love to tend and take care of plants and other creatures as a daily pleasure. Starting out small and letting the passion grow is a really sound approach.
If you’re a real homebody like I am, you’ll find it’s a distinct advantage toward becoming a really good plant propagator. As a teenager, I loved breeding sweet little black-and-white “Dutch” mice (until I realized that the pet stores were selling my babies for snake food), then rabbits, and then my attention turned to raising finches and parakeets. Now, I no longer keep caged animals but have focused my attention to loving the wild animals and tending plants and landscapes that provide for them.
My plant propagation efforts started about thirty years ago when my mother gifted me with my first Cape primrose plants (Streptocarpus). I kept them both indoors and outside, and then came to realize that I could start more of these beautiful flowering plants from nothing more than a piece of a leaf! I was hooked, and within a few years and some practice on a variety of different plants, ALL my fingers turned into green thumbs!
My first “grow bench” was multipurpose: a little bit of covered outdoor table space for an odd assortment of plants. My first “misting bench” was an old mortuary table that one of my sons picked up out of a dump pile; it was pretty easy to repurpose it! Now I have a larger misting bench, complete with an automatic misting system that is a repurposed old metal awning frame. My first greenhouse was a very simply and cheaply constructed hoop house made from PVC piping and heavy mil (weight) plastic sheeting.
Can You Commit Some Funding?
To get a good start in a home nursery you will need space for a craftsman-like work place in the shade. You will want to set up a space where all the propagation activities (such as sowing seeds, striking cuttings, and transplanting) can be easily and comfortably accomplished. You might also want some indoor space to set up a grow-light system.
It’s also really important that these working surfaces stay clean and free of excess plant and/or soil debris. Metal or plastic tables are much better than wooden working surfaces. You will want to set up a propagation work area much like you would think of organizing a kitchen, and you’ll want to keep the surfaces and all your tools clean and organized, just like you would in a kitchen.
You’ll also need space to store some soil and various soil components and a variety of containers close to the propagation work area. You may want a protected grow bench for seeds and small seedlings, and maybe a misting bench for cuttings.
You’ll need space to grow plants on to larger sizes; each time you “pot up” you are moving the plant to a larger container and that will take more room. I like a growing-on area that is also easy to keep clean. I cover the ground with a heavy-duty woven groundcover fabric, and elevate the plants on benches or shelving that is at least 18” high. The ground fabric is heavier than the type used by landscapers under mulch; it can easily be held in place with earth staples, and it is easy to sweep away any plant debris that might accumulate. Grow-on benches or shelves are easy to construct with cinder blocks and heavy-duty wire panels. An ideal nursery grow area needs both sunny and shady places to grow plants; a shady place to let newly potted plants acclimate, and then both shade and full hot sun to accommodate the needs of a variety of species.
You may want to set up your nursery grow area with automatic irrigation systems, although nothing replaces a dedicated propagator actually looking at and tending the plants each and every day. “Spot spitters” are a simple and effective way to water each individual plant in a container. Spot spitters are available in different flow rates, and each one has an on and off position. I also use mini-sprinklers for flats of seedlings and small plants, but I add an on/off valve to each sprinkler. That way I can efficiently water just a few plants or many more at peak seasons.

The shade house at our new growing grounds can hold a lot more plants! It has taken me 20 years to commit to this level of plant propagation. I started out with very small, homemade benches.
Nursery Containers
Nursery containers can be recycled and reused many times, but they will need to be cleaned and sterilized in between uses. I use either a very mild bleach or hydrogen peroxide solution to soak the pots in first, and then another bucket of fresh water to rinse them after I’ve brushed each one clean. Then they need to dry, and the sterilized pots should be stored in a clean container.
I’ve also devised a “hot box” type of approach to sterilizing some nursery containers. I set up a cold frame in a very hot, sunny place, put a group of pots into it and use a jet of water to remove any old soil and debris from inside the pots. The lid gets closed and the heat rises on sunny days to anywhere between 120 to 140 degrees, effectively sterilizing the pots with a lot less manual effort!
Be selective about your nursery containers; avoid using old food containers or an assortment of oddly sized pots. Consistency in containers translates to a consistency in watering and fertilizing of each plant, and less space needed. Nursery containers should be at least 2 inches deep; be sure that all containers have good drainage holes.
Soil Components and Mixes
If you plan to propagate on a regular basis, you will want to have a good basic organic soil to start with and a clean, out-of-the-way area to store perhaps as much as a cubic yard at a time. I keep my basic soil on a clean tarp, covered with another tarp.
If you plan to propagate on a regular basis, it will make sense to keep the basic components for a variety of soil mixes on hand. Components are either organic: peat, coir, sphagnum, compost, humus (such as leaf mold) and vermicompost, or mineral: perlite, vermiculite, pumice, lava rock and sand. I store various soil components and mixes in large plastic containers, each one with a lid. The soil, components and soil mixes all need to be moist when stored, so to assure that I’m not creating anaerobic conditions, I’ve drilled holes in the bottom and lower sides of each storage container. Please see the handout, at right, Plant Propagation in a Home Nursery, for full details on soil components and some suggested soil recipes.
ORGANIC
Peat Moss adds moisture retention qualities, and also acidifies the mix; or (if you object to using peat or sphagnum) use Coir Fiber also adds moisture retention qualities.
Sphagnum moss is believed to have a natural sterility that slows or stops certain plant diseases, such as damping off
Vermicompost is great in the seedling mixes; it is very high in organic phosphorous, which is essential for vigorous root growth.
And a good quality compost or leaf mold is great for plants that need a little richer soil.
MINERAL
Perlite which has no nutrient value, but makes the mix lighter and helps to ensure good drainage.
Vermiculite which has some available minerals, retains some water, and also lightens up the mix and aids with drainage.
Small Lava Rock, sometimes available in either a 5/16” size with lava sand or a 3/8” size for use in larger containers. Either one is an aid in drainage and lava sand is also useful for plants that can’t take excess moisture.
Pumice is another aid for good drainage
Coarse River Sand which promotes really fast drainage, but never use playbox or beach sand, which contain salts.
Classes
Habitat Garden Summer Camp July 8-12 2024 Open to incoming 2nd-5th Grades Home Ground Habitats in Novato is excited to announce our first annual Habitat Garden Summer Camp for children. Click here for more information Plant Propagation Classes July – Sept 2023...Urban Farmer Store
FOR: all kinds of irrigation equipment and supplies, lines and sprinkler heads; also irrigation timers and good advice.DripWorks
FOR: Quality drip irrigation supplies; predesigned plans for irrigation systems, big library of how-to videos.Martin Brothers Supply
FOR: organic soils and composts, especially good are super-harvest and mushroom composts for ornamentals and veggies.<none>
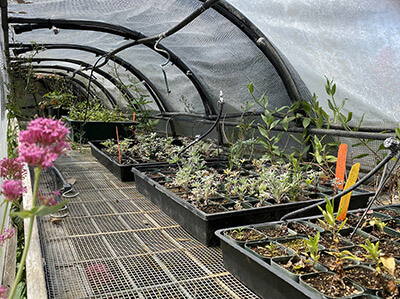
My hoop house for holding newly-transplanted seedlings is made from curved PVC pipe with a heavy weight plastic covering clipped onto it. A misting system keeps the seedlings evenly moist. The base is made of 2x4s with coarse metal screening on top.
Handouts
Recommended Reading
Plant Propagation
American Horticultural Society Plant Propagation: The Fully Illustrated Plant-by-Plant Manual of Practical Techniques
1999
Creative Propagation, 2nd Ed.
2005
Making More Plants: The Science, Art and Joy of Propagation
2012
Propagation Handbook: Basic Techniques for Gardeners
1995
Secrets of Plant Propagation
1985
Supplies
Irrigation
DripWorks
http://www.dripworks.com,
190 Sanhedrin Circle, Willits, CA 95490, 1-800-522-3747
FOR: Quality drip irrigation supplies; predesigned plans for irrigation systems, big library of how-to videos.
Urban Farmer Store
,
653 E Blithedale Ave, Mill Valley, CA 94941 415-380-3840
FOR: all kinds of irrigation equipment and supplies, lines and sprinkler heads; also irrigation timers and good advice.
Compost, Soil, Stone and More
Grab N’ Grow Soil Products
http://grabngrowsoil.com,
2759 Llano Road, Santa Rosa, CA 95407, 707-575-7275
FOR: bagged or bulk soil products and composts; organic nursery planter mix; All-green compost; cardboard in rolls for sheet mulching.
Harmony Farm Supply
3244 Gravenstein Highway North, Graton (north of Sebastopol). 707-823-9125
http://www.harmonyfarm.com,
3244 Gravenstein Highway North, Graton (north of Sebastopol). 707-823-9125
FOR: vegetable starts (organically grown on site), bare root berries and fruit trees in season, soil amendments, compost bins, tools.
Martin Brothers Supply
http://martinbrotherssupply.com,
232 Shoreline Highway, Mill Valley (Tam Junction) 94941, 415-388-2025
FOR: organic soils and composts, especially good are super-harvest and mushroom composts for ornamentals and veggies.